
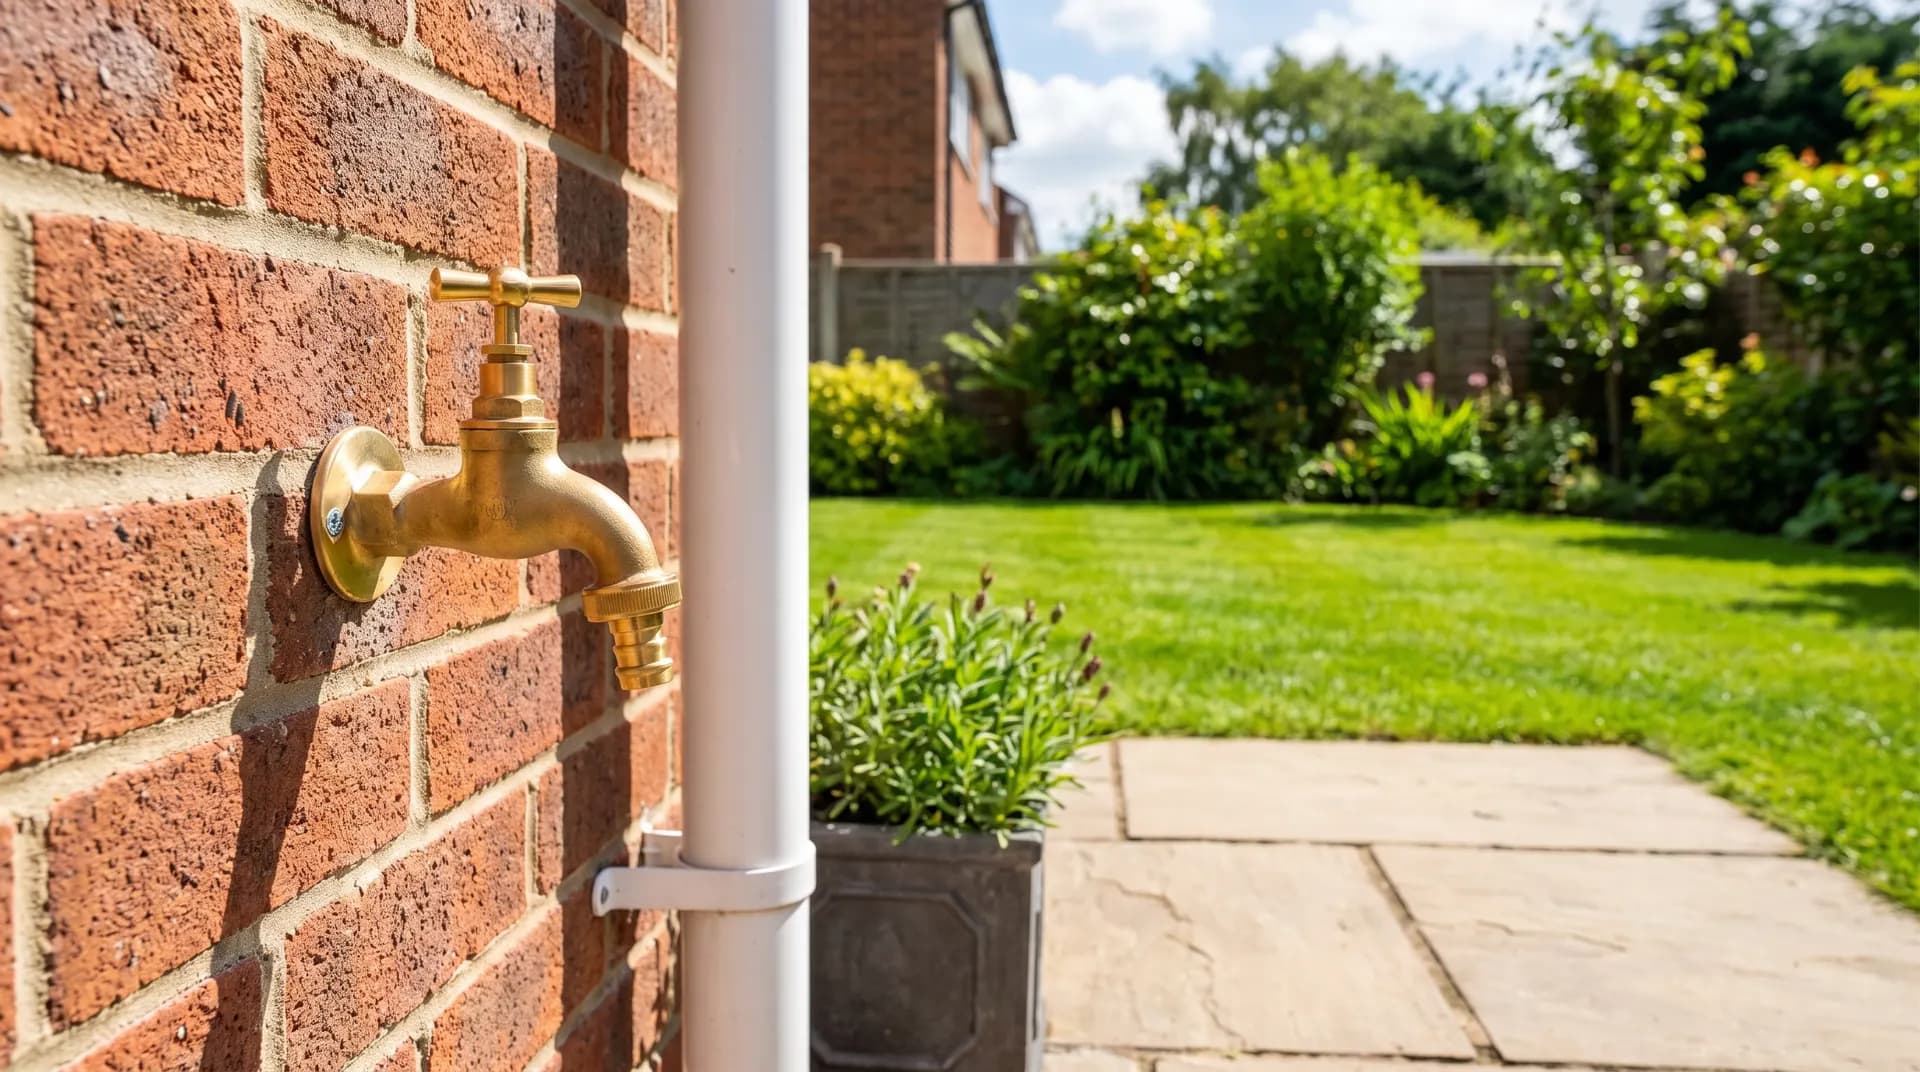
How to Install an Outdoor Tap
Run a reliable cold-water supply from inside the house to an outside tap — isolation valve, drill through the wall, fit a self-cutting ferrule or through-wall fitting, and finish with a frost-protected tap.
- Category
- Plumbing
- Difficulty
- Advanced - consider hiring
- Time
- 2–4 hours
- Read
- 5 min
Plumbing · Star Hawk Builders Merchant
Run a reliable cold-water supply from inside the house to an outside tap — isolation valve, drill through the wall, fit a self-cutting ferrule or through-wall fitting, and finish with a frost-protected tap.
5 min read 2–4 hours Advanced - consider hiringPublished 11 July 2026
Plan the route and check the rules
Before you start, decide where the tap will go (out of the way of foot traffic, ideally 300mm above ground for clearance) and how the pipework will run from inside the house to outside.
UK Water Regulations require any outdoor tap to have:
- An isolation valve inside the house, on the cold feed.
- A single check valve to stop water in the garden hose siphoning back into your drinking supply.
- A frost-protected tap body with drain-down capability, or you isolate the supply in winter.
Most builders' merchant-grade outdoor tap kits contain the tap, the through-wall fitting, an isolation valve and the check valve. Get a WRAS-approved kit — it's the standard the water authorities accept.
Tip: tee off the kitchen cold (it's the closest pipe in most houses and easy to isolate). Run the pipe in 15mm copper or 15mm plastic barrier pipe — never push-fit inside a wall without a protective sleeve.
Drill the hole
Pick a position on the outside wall about 300–500mm above ground level (so a watering can fits under it without stooping, but the tap is high enough to clear a bucket). Avoid drilling through the visible face of a feature wall or rendered finish if you can — go through a less visible side.
- Check the wall with a multi-detector for cables and pipework. Stop and seek advice if you find live cables.
- Mark the hole position on the outside wall, and on the inside wall in line with it. Use a spirit level to line the two up.
- Drill from inside the house through to outside using a 22mm diamond-tipped masonry drill bit for a 15mm pipe. Drill slowly, withdrawing the bit every 5 seconds to clear dust and cool the diamond. Stop just as you break through to the outside face — you don't want a "blow-out" patch on the visible brickwork.
If you hit a cavity, the bit will drop through into the gap — drill through the outer leaf as well from the outside, again using the hole as a guide.
Common mistake: drilling through the DPC (damp-proof course). The DPC is normally a few bricks above ground, just above the floor level. Cut a small channel in the plaster to redirect the pipe slightly if you need to dip below the DPC, then seal the pipe entry with silicone so water can't track along the outside of the pipe into the wall.
Tee into the cold water supply
Turn off the cold water at the main stopcock and drain the pipework by opening the kitchen tap.
Cut the cold water pipe at the tee point (a short stub of exposed pipe, often under the kitchen sink or in the cupboard) using a pipe cutter (not a hacksaw — hacksaw cuts leave burrs). Fit a 15mm compression tee to the pipe, then run 15mm pipe to the hole through the wall, securing it with pipe clips every 600mm.
At the inside end of the hole, fit an isolation valve with the arrow pointing in the direction of flow. Then a double-check valve (or, in most kits, a combined isolation + check valve fitting). This is your one job to do well — if the check valve fails the water authority will require the whole fitting to be ripped out.
Fit the through-wall fitting and the outside pipe
Push the pipe through the wall to the outside. From the outside, fit the through-wall plate — a brass flange with a 15mm compression outlet that screws to the wall and seals against the brickwork with a rubber gasket. Use stainless-steel screws and wall plugs so the plate doesn't rust off in two winters.
Cut a short stub of 15mm pipe (about 100mm) to go up from the through-wall plate to the tap inlet, then fit the tap. Hand-tighten the tap, then nip up with a spanner — over-tightening will crack the brass body.
Turn it on and test
Open the isolation valve slowly and check every joint for leaks with a dry tissue — even a slow drip is worth tightening now. Run the tap for a minute to flush any debris out of the new pipework, then close it and check again at the joints.
Tip: if a joint drips, don't keep tightening — that risks cracking the olive. Instead, slacken off, check the olive is correctly seated, and re-tighten.
Wrap the body of the tap with insulation (foam pipe lagging or a purpose-made tap cover) before the first frost. Even a frost-protected tap will benefit from insulation — it takes the edge off the worst weather.
Materials and tools checklist
Materials
- Frost-protected outdoor tap with integral check valve
- Through-wall plate and gaskets
- 15mm compression tee
- Isolation valve (often included in tap kit)
- 15mm copper or plastic barrier pipe
- Pipe clips and wall plugs
- Pipe insulation / foam tap cover
- Silicone sealant (for the through-wall entry)
- PTFE tape
Tools
- Pipe cutter
- 22mm diamond-tipped masonry drill bit (and SDS or hammer drill)
- Multi-detector
- Adjustable spanners and pipe wrench
- Spirit level
- PTFE tape
When to call a plumber
In many UK water authorities, work on the consumer's pipework (the pipework inside the property boundary up to the meter) is something you can do yourself. If you're not confident with compression fittings or pushing a pipe through the wall cleanly, the job is a quick one for a plumber — typically 1–2 hours and well worth it. Call a plumber if:
- You're unsure how to tee into the existing pipework
- The route involves running through floorboards or hidden voids
- The wall is structural, multi-leaf or has hidden utilities
- You've accidentally drilled into a cable or pipework (turn off electricity / water and call an emergency plumber)
We supply the outdoor tap kits, pipework, fittings, insulation and sealants at trade prices, with next-day delivery across the South East.
Frequently asked questions
Do I need an isolation valve for an outdoor tap?
Yes — UK Water Regulations require a single check valve and a means of isolation inside the house. Most outdoor tap kits include both. Without the check valve, garden hose water can siphon back into your drinking water supply, which is illegal and unhealthy.
Can I take a feed for the outdoor tap from the kitchen cold water?
Yes — that's the standard approach. Tee off the cold water pipe as close as practical to where it enters the kitchen, run a 15mm pipe to the outside wall, drop down to the tap. Ideally not more than 1m of run inside the house to keep the cold water feed close.
Do outdoor taps need to be frost-protected?
Yes — fit a frost-protected tap with an integral check valve. These are designed so that residual water in the body drains out when you turn the tap off, leaving the valve body dry. A standard outdoor tap will split the pipework the first hard frost.
Do I need to notify Building Control for a new outside tap?
No — an outside tap is classed as 'minor work' under Building Regulations as long as it has an isolation valve and check valve. If you're in a conservation area, listed building or new-build with a warranty, check with your local authority or warranty provider first.
Can I drill my own hole through the wall?
Most walls, yes — with a 22mm diamond-tipped masonry drill bit for a 15mm pipe. Avoid the DPC (damp-proof course) line if possible. Stop and check for cables, pipework and gas lines before drilling — use a multi-detector first. Avoid drilling into a cavity wall at the same level as joists or structural beams.
Ready to start? Get a plumbing materials list.
Send us your measurements or project plan and we'll come back with stock, a written quote and a delivery slot — usually within the hour during trade hours. from £40 in parts, plus a plumber if you need one for typical installs.
Related how-to guides
More step-by-step walkthroughs to help your project run smoothly.
How to Build a Block Wall
How to build a clean, level block wall that will stand the test of time — from setting out, through the foundation, mortar mix and laying every course to a crisp brushed finish.
How to Fit Guttering
A practical guide to fitting uPVC guttering — work out the fall, fix the brackets at the right spacing, cut and joint the gutter lengths, fit the downpipe and test for leaks.